Lesson 1: Where Do I Start?
Most PIM users want to immediately create a whole bunch of product attributes and import all of their items into the PIM immediately and get everything up an running super fast. Without taking the time to understand PIM concepts this is a recipe for disaster.
It does not matter what PIM solution you ultimately choose if you do not understand how to make the PIM work properly for you.
Each PIM is going to have nuances and concepts that need to be understood in order for your team to effectively manage your product data.
First, take time to understand your data. Literally, open a spread sheet and take a moment. Identify your attributes. Since you are used to working with spreadsheet columns you probably have a different column for each different product attribute. Lets identify 3 or 4 general, simple column names from your spreadsheet. These are most likely attributes. Hopefully you have 3 or 4 columns called something like "short description", "item number", "long description" and possibly "brand." DO NOT worry about the additional attributes and data columns. Lets ignore those for now.
Write your 3 or 4 starting column names or "attributes" on piece of paper similar to how we present our sample attributes below. Start thinking of spreadsheet columns as attributes.
Write your 3 or 4 starting column names or "attributes" on piece of paper similar to how we present our sample attributes below. Start thinking of spreadsheet columns as attributes.
|
Attribute Name
|
Type
|
MAPS TO
|
|
item number
|
string
|
|
|
description
|
string
|
|
|
brand
|
string
|
|
|
product name
|
string
|
|
PIMInto has some predefined attributes. These are predefined fields that already exist. These include:
-
sku - REQUIRED. This is also know as stock keeping unit, item number, part number, code, product id or any other filed name that is used to uniquely identify a product. Every product or item in the PIM must have a unique SKU or item number.
-
title - STRONGLY SUGGESTED. This is a description of the product also known as short description, product title, product name, display name, caption, or other value that best describes the specific product. We suggest that every product has this value because this makes products easy to identify.
-
date_created - You can ignore this while you are getting started. This is a system managed value that stores the date and time when an item was created in the PIM.
-
date_modified - You can ignore this while you are getting started. This is a system managed value that stores the date and time when an item was created in the PIM
-
status - You can ignore this later on you will discover this is very important. This is a value that is used to store the item or product status in the PIM.
-
thumbnail - You can ignore this for now since we will work with images later. This is a value that is used to store and display the link to a small picture or photo of the product. This value is automatically managed by PIMInto if an photo or image file has been linked to a product or item.
We have just learned that there is already a unique field called "sku" for storing the item number and there is also a field called "title" for storing a short item description. Lets look at the 3 or 4 starting attributes we picked and map them to existing fields in the PIM
|
Attribute Name
|
Type
|
MAPS TO
|
|
item number
|
string
|
sku
|
|
description
|
string
|
|
|
brand
|
string
|
|
|
product name
|
string
|
title
|
We can map 2 of our initial column names or attributes to names that ALREADY exist in PIMInto. Since these attributes already exist we do not need to create them. Based on the simple list above we have 2 additional columns or attributes that we need to add to our PIM. description and brand
Lets add them.
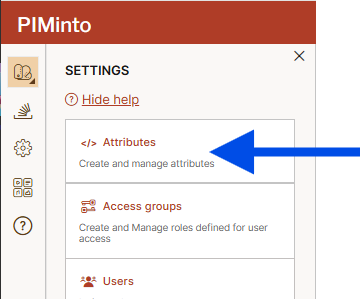
Log on PIMInto and go to: Settings -> Attributes
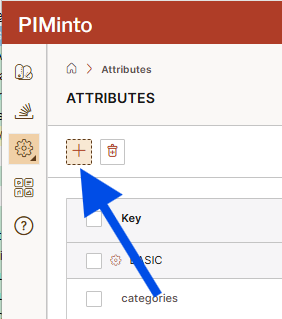
The Attributes window opens and you will need to click the "plus" icon
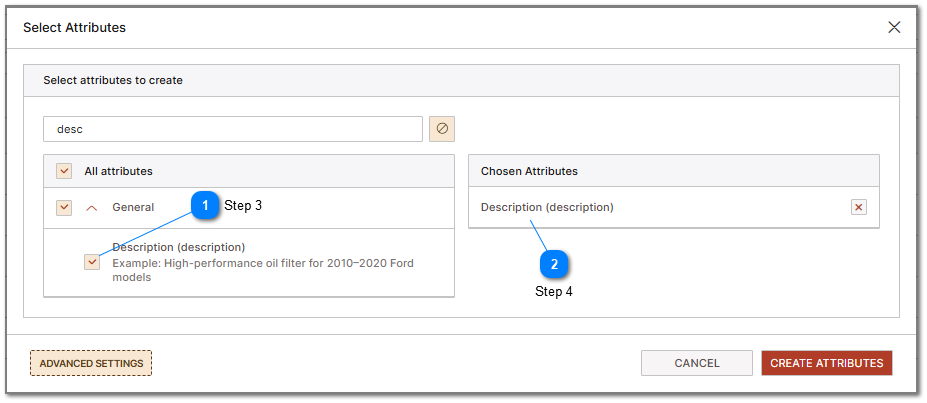
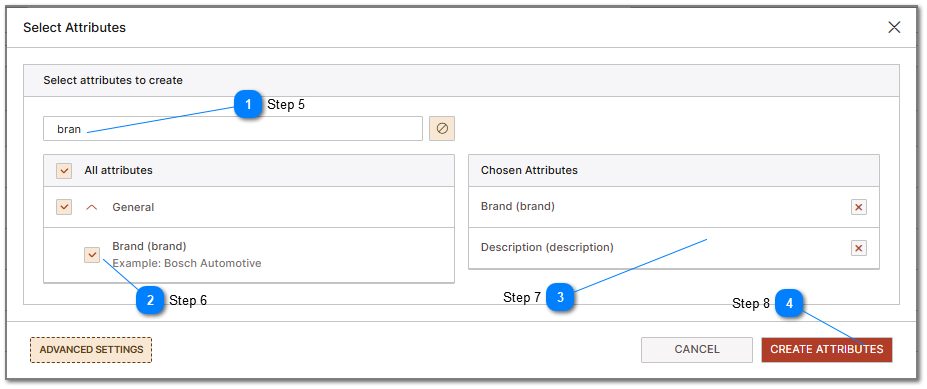
The Select Attributes window will display and you will be able to add your first 2 attributes.

Next, select the attribute and make sure it appears in the list on the right side of the window under "Chosen Attributes".
Repeat the previous step in order to search for an add "brand" to the list of chosen attributes.
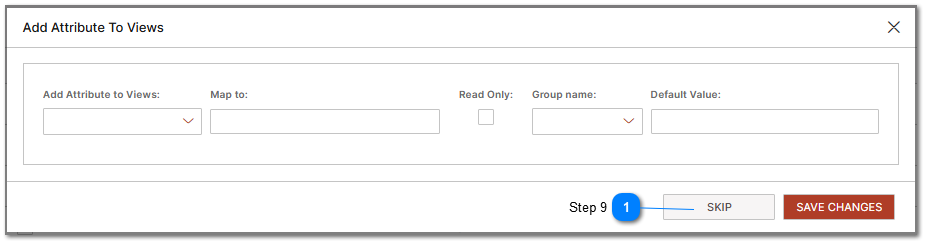
The next screen asks a question that may be intimidating. Lets chose the "skip" option for now since we have not discussed what "views" are and we have not created any.
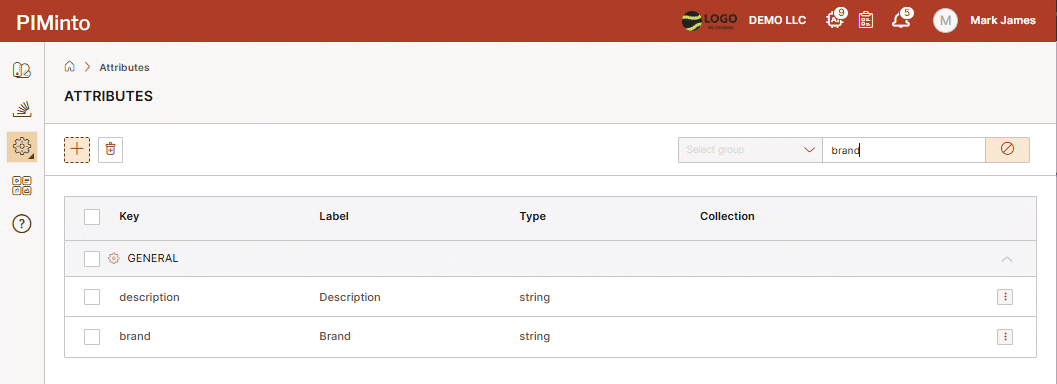
Your Attributes are now created. You can see them in your list of defined PIM attributes. If you would like to change the properties of the attribute later you can. It is important to know that you cannot change the attribute name and the attribute type. If you need to change the name or type, then you will need to delete and recreate the attribute. This may be annoying at first but there are reason for this including guaranteeing data consistency and validation.